Orders placed today ship out in 5-7 business days. Due to heavy demand, we can't guarantee arrival by Christmas.
Sticky VHS tape repair
If you're preparing to transfer VHS tapes to digital, you'll want to make sure that the tape inside the VHS cassette gets properly exercised first. Tapes that have been stored and not used for many years often tend to stick when they play back. It's often caused by small traces of mold on the tape caused by bad storage conditions. Some older video tapes also experience bad shedding, where the magnetic oxide separates from the binding agent that holds it to the mylar tape base. In either case, it's a major problem that can seriously affect the playback ability of the tape. In some cases, baking your video tapes may temporarily cure the 'sticky-shed' problem. Read our "Baking Videotapes" article.
Playing back one moldy or sticky tape can make the entire tape path sticky, then any other tape that's played back will squeal, jam up and cause troubles. Important: cleaning tapes in an attempt to remove mold can release spores into the air, causing a potential health hazard. Please take appropriate protective measures before proceeding.
Important : Do not wipe the tape surface with solvent or alcohol. In our experience, cleaning the tape with a solvent will remove an important lubrication layer from the video tape. The cleaned tape will then stick very quickly when it passes across the video head drum.
Fast forwarding and rewinding a tape that has mold wil release the spores into the air. Wear the proper protection.
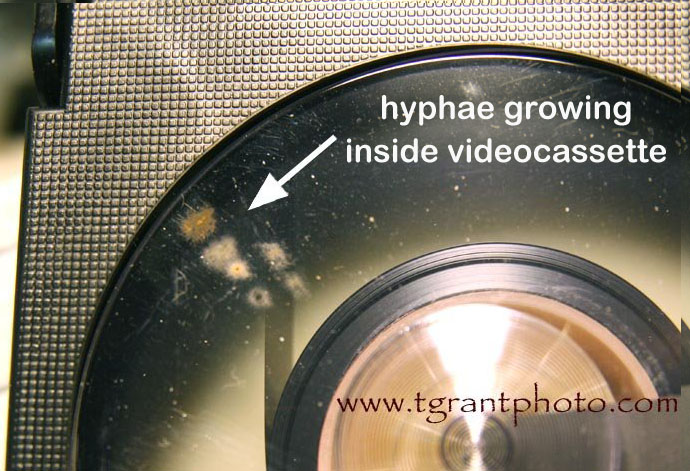
Mold is a fungus that grows in the form of multicellular filaments called hyphae.
above photo: Hyphae growing in the window of a videocassette is a very bad sign!
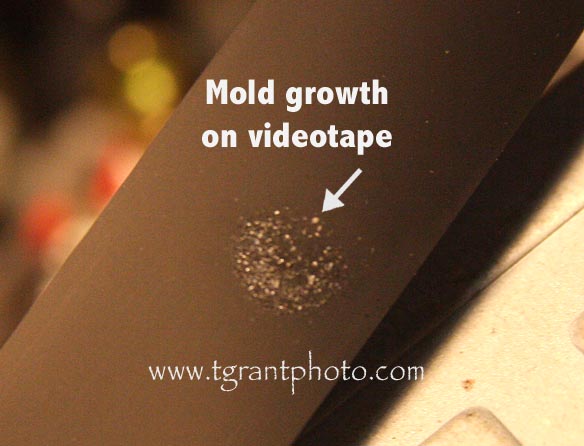
above: mold growth on the tape itself....a really sticky mess!
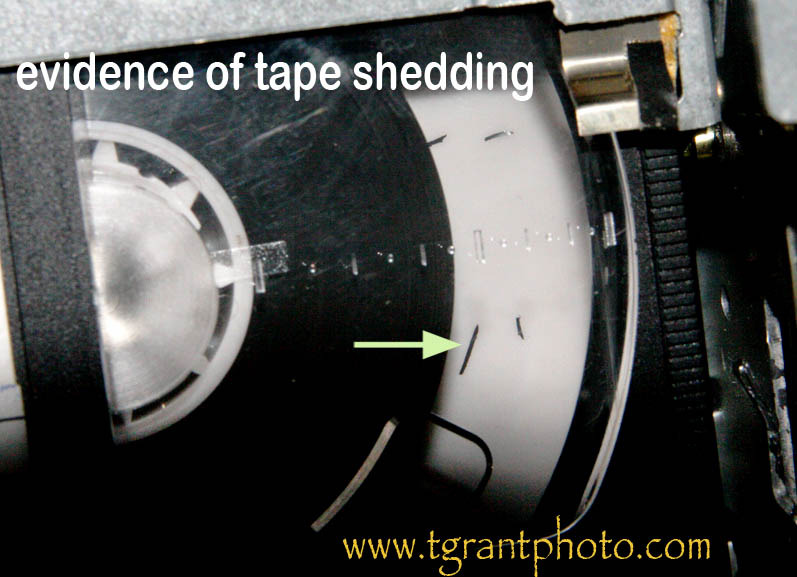
above: tape shedding inside a VHS cassette
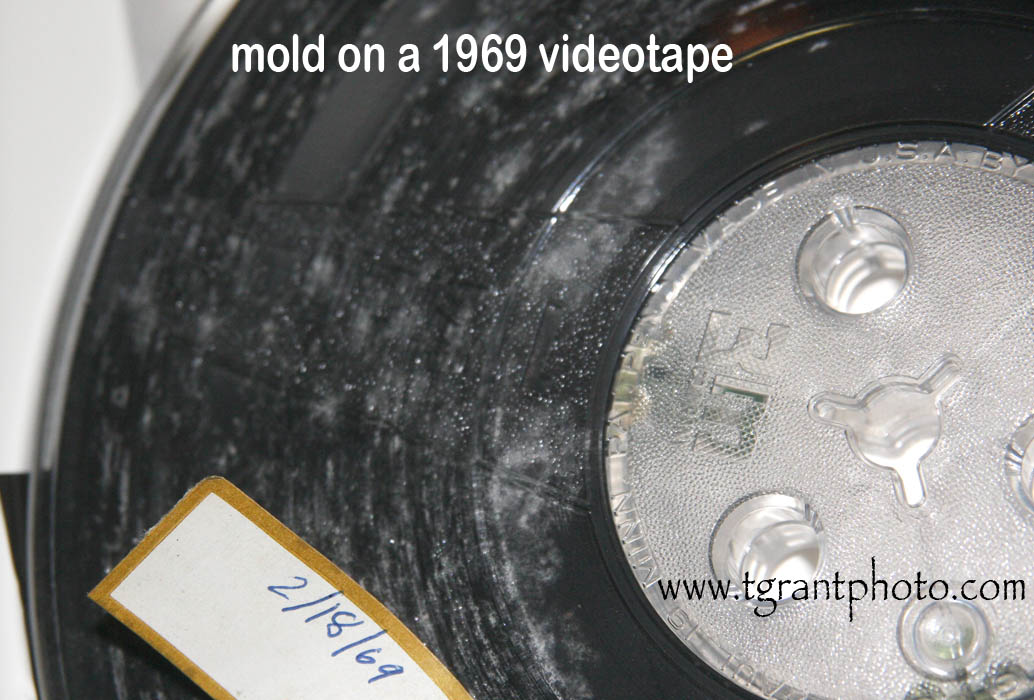
above: mold on a 1969 1/2" reel-to-reel videotape
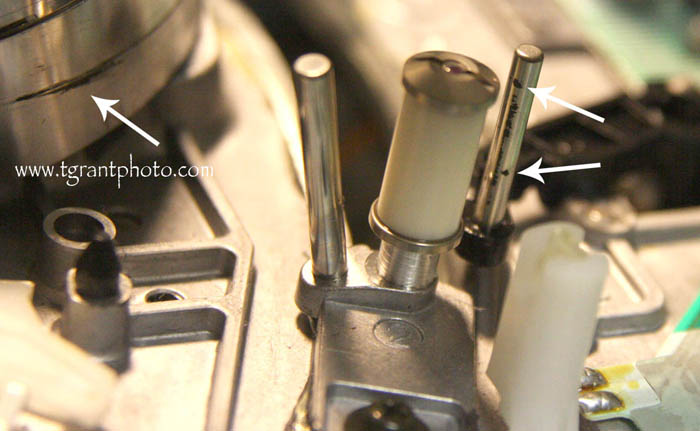
above - evidence of tape shedding (or stickiness) on one of the guide rollers. Also, notice the residue at the bottom of the head drum
Tip: Before playing a tape of unknown quality in your expensive VCR, we recommend first running it on an inexpensive VCR, often available from a thrift store. If the tape drags and sticks in the inexpensive VCR, it will certainly cause problems in your expensive VCR.
Before playing any old VHS tape, always fast forward to the end of the tape, then completely rewind the tape. This repositions the tape on the cassette spools, and often gets rid of loose magnetic oxide that could clog your precious video heads. Sometimes that's all that's necessary to make an old tape playable. However, if you're unlucky, you'll hear a squealing noise and your tape will either freeze during playback, or get eaten by your VCR! This is perhaps the worst scenario for your VCR. It's video heads can get clogged, or in the worst case, irreparably damaged.
Tip: before transferring any old tape, you'll want to carefully inspect the tape path for any residue that's built up on the rollers or head drum. Rollers can be cleaned with a swab dipped in 91% isopropyl alcohol. Warning - before attempting to clean the video heads, read this article
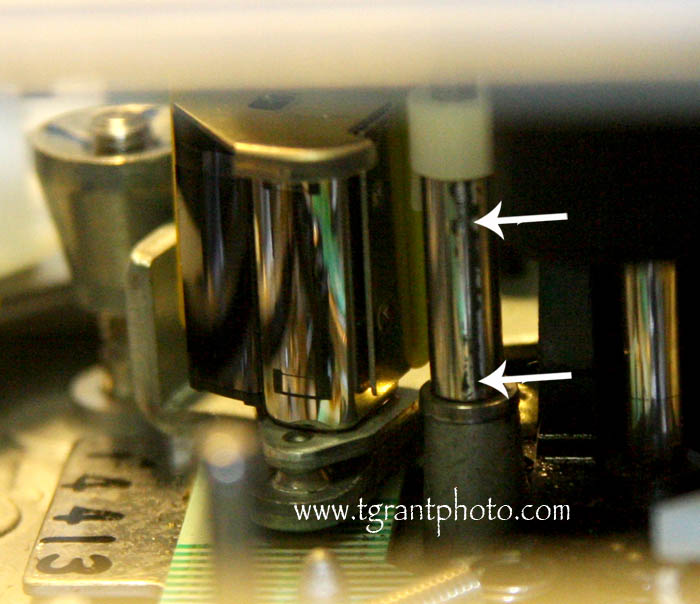
above - Hard to spot! On this Panasonic AG-1970, tape residue hides on the guide roller beside the linear audio head. You have to inspect all the rollers carefully, a small flashlight helps.
Tip: Video tape is very sensitive and can be damaged by oils from human hands. Keep isopropyl alcohol and any solvents away from the actual tape surface, it will destroy the important lubricating layer of the tape. Before proceeding, consider wearing latex gloves, or at least wash your hands thoroughly. Work on a clean surface. Soft tissues can be used to wipe debris from the tape, however avoid handling the tape as much as possible.
The first thing to check is the back tension of the VHS cassette. Remove the VHS cassette from the machine. Press the button on the side of the cassette and open the front flap of the VHS cassette. Tip: The button may be black colored, making it harder to spot!
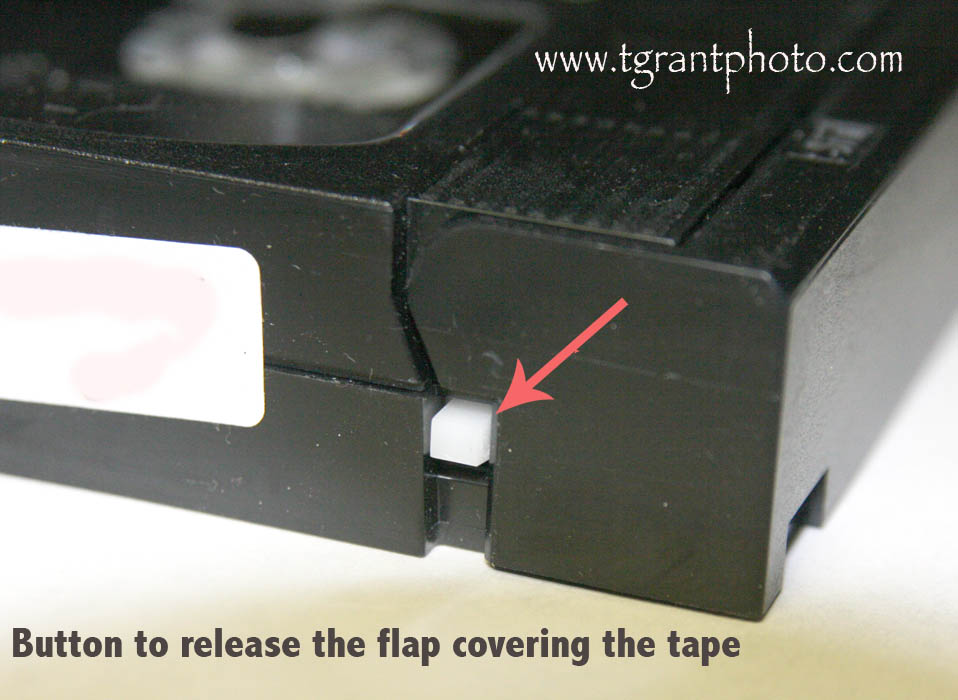
Holding the flap open with one hand, insert a pencil in the round hole in the center of the bottom of the cassette. This will unlock the ratchet that holds the tape spools.
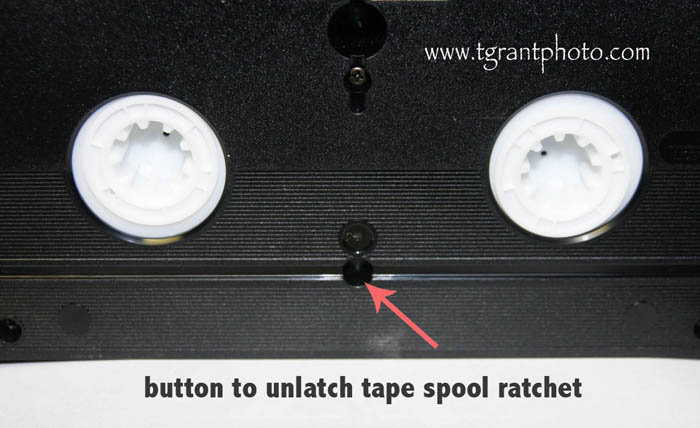
With the ratchet to the spools unlocked, carefully pull out a few inches of tape out. The tape should pull out smoothly. However if the tape has mold or stickiness, it probably will be hard to pull. Look closely at the silver rollers in the front of the cassette, the tape passes over these as it plays. If they're coated with black goop, you have problems. Tip: sometimes the rollers are white plastic, not silver.
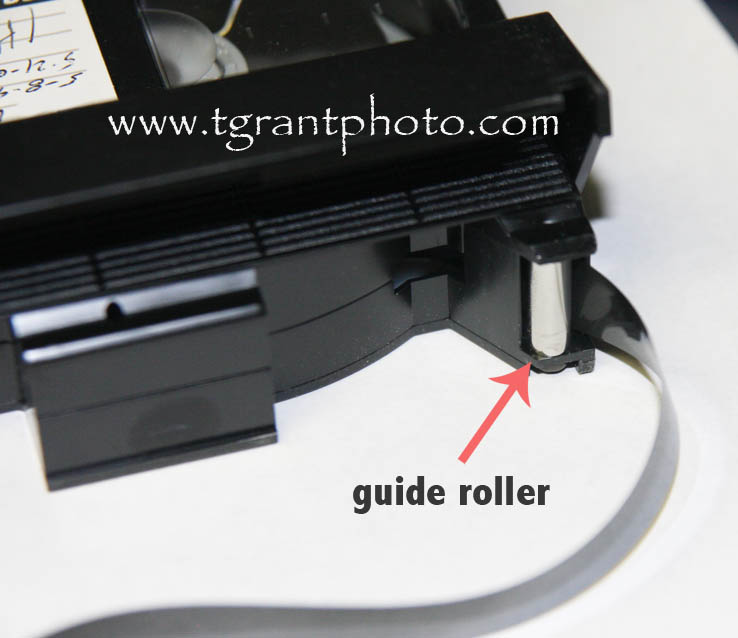
Tip: Do not clean the tape with solvent. In our experience, cleaning the tape with a solvent will remove an important lubrication layer from the video tape. The cleaned tape will then stick very quickly when it passes across the video head drum.
At this point try to clean the silver (or white) guide rollers on the tape cassette with 91% isopropyl alcohol. Pull the tape away from the rollers while you're doing this, and allow about 30 minutes for the alcohol to evaporate before playing the tape. Roll the tape back onto the spool by manually turning the spool from underneath the cassette (you'll hear a clicking sound as the ratchet engages the tape spool). If, after cleaning the rollers, the tape plays for a while but then starts to stick again, you need to bake the tape.
Baking videotapes has been widely proven as a successful method for making sticky tapes playable. Do not bake the tapes in a conventional oven, instead use a tape dehydrator. Read our do-it-yourself tape baking article. After baking, the problem tapes play well for a month or so. This gives you ample time to transfer the tapes to digital. Unfortunately this process can take 8-10 hours, but the results after baking are very rewarding!
~ Tom Grant TGrant Photo LLC.
Note: The above content is copyright TGrant Photo LLC.. Copying or use on another website is prohibited
further reading on this subject:
Tom Grant, Do-It-Yourself Tape Baking http://www.tgrantphoto.com/sales/index.php/content/baking-video-tapes (November 2016)
Eddie Ciletti, If I Knew You Were Coming I’d Have Baked A Tape! A Recipe for Tape Restoration,
http://www.tangible-technology.com/tape/baking1.html, (2011)
Charles A. Richardson, U.S. Patent; Process for restoring magnetic recording tape damaged by “sticky shed” syndrome US 6797072 B1, https://docs.google.com/viewer?url=patentimages.storage.googleapis.com/pdfs/US6797072.pdf
Dr. John W.C. Van Bogart, Magnetic Tape Storage and Handling A Guide for Libraries and Archives (June 1995) https://www.clir.org/pubs/reports/pub54/2what_wrong.html
Texas Commission on the Arts (2004), Videotape Identification and Assessment Guide (accessed August 26, 2017) http://www.arts.texas.gov/wp-content/uploads/2012/04/video.pdf
Wikipedia - Sticky Shed syndrome on audio tapes
Wikepedia - Hypha
